
There are no mistakes in art. Baking is an art. Therefore, there are no real mistakes in baking. So there! Week 7: An attempt at a raspberry charlotte.
In honor of Valentine’s Day, I wanted to make something pink and yummy. I chose a charlotte with raspberries and strawberries from my quick-look baking book and dove right in. It’s one of the desserts that I’ve seen the contestants on multiple baking shows try and fail numerous times, but I thought I’d give it a try anyway! It is essentially a free-standing mousse cake, with lady finger cookies lining the outside. It should be light and fluffy, creamy and rich, all at the same time. Sounds easy, right?
The first step is to buy or make the lady fingers that will line the outside. They are simple sponge cake cookies that are whipped and piped onto baking sheets – quite fun to make! You can even make them into designs if you feel inspired though they don’t always hold their shape too well. The classic shape is a straight line, but I imagine they would be yummy in any configuration! I now make my own since they are such a quick recipe, but there’s no shame in buying them. The only odd thing, is that most grocery stores in the Bay Area consider them to be a “seasonal” item. As if people only bake during the holidays.. silly stores.

Gotta separate those eggs! I use the two halves of the egg shells to separate mine, but hands work just as well. Once they are separated, it’s all whipping and folding from there.

The figure eight way of folding ingredients into a delicate batter is not only pretty, but super effective! Thanks Two Fat Ladies for that trick. Side note: if you’ve never seen that show, you’re missing out.

I broke in my new canvas pastry bag with this recipe. (Hint: So worth it. Way better than plastic piping bags.) And as I’ve learned from Weezie Mott, cooking teacher extraordinaire, never use dish soap to clean it! You clean it in boiling hot water and hang it up to dry like a pro.


Add a dash of sugar on top and into the sauna they go! As with the macarons in week 4: you can make a stencil for them on parchment paper if you’d like them to be perfectly even. As you can tell, I have more of a ah-that-looks-about-right kind of piping technique. Definitely planning to experiment with stencils in the future!
Another quick note about the lady fingers: if you need them to be softer or crisper, I made a discovery that might help you! I made two pans full, and took one out of the oven right when the timer went off, and the other I left in a cooling over with the door cracked open. The ones left in the over dried out more and so had a nice, crispness to them. The ones I took out immediately were lovely and soft.


The goal is to not have any gaps in your lady finger wall, but alas, ladies don’t always follow the rules. I brushed them with a little raspberry liquor, yum! You can see that I also lined the pan (a 6-cup souffle pan, thanks to a generous mom for letting me borrow from her impressive collection of baking pans) with parchment paper. Not an easy feat to get it sit correctly, but with a little patience it will eventually fit.
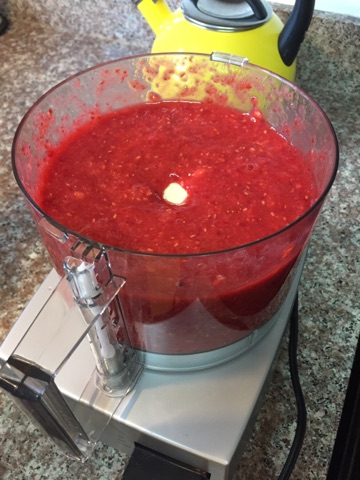
A mixture of raspberries and strawberries make up this lovely puree.
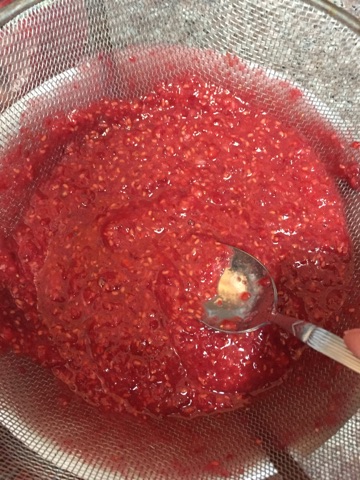
I had to put on an episode of West Wing for this part. So many seeds, such a fine sieve!


The egg yolks had to be whipped into a frenzy with a sugar syrup to make them shiny and smooth. I began with my tiny bain-marie and had to graduate to a bigger bowl when they started to expand.

Action shot of the swirling gelatin, egg yolk mixture, whipped cream and berry puree.

It looked so promising at this stage! Pre-overnight stay in the refrigerator. It can be 6 hours instead of overnight, but I am a night-time baker and didn’t get a chance to pop it in the fridge until 7pm.

Post-fridge vacay. About to be inverted and prove it’s worth!

Crash and burn. After a moment of silence for the death of the gelatin, it was reincarnated as a trifle! Luckily, there is a lovely desert that is literally this: sponge cake layered in a dish with cream, berries/puree and sometimes other goodies.


Ta-daa! Like nothing ever happened.
Back to my tagline: It’s okay, it still tastes good!
Now, there’s a possibility that my gelatin was faulty. I was using the powdered kind instead of the gelatin sheets they recommend in the recipe. However, I think it is more likely that I didn’t prepare it correctly. I simply stirred it into a measured amount of water on the stove until it appeared to be dissolved. From my research after the fact, it appears that gelatin likes to be hydrated first and then heated (or, sprinkling the gelatin over cold water first, and then heating it slowly. I’m not sure if that will make a difference the next time I try this recipe? I would love to try the gelatin sheets mentioned in the original recipe. I’ll have to look into where you can buy them!
Or of course, my fridge might not be up to parr on it’s coldness. But enough excuses. I shall live to bake another day. And someday will revisit this mousse mountain inside a dainty lady finger wall.

One thought on “Raspberry Charlotte . . . I mean, Raspberry Trifle”